Brick Walkway Repair: Your Ultimate Guide
Are you tired of tripping over loose bricks on your walkway? Brick walkways add charm and character to any property, but over time, wear and tear can lead to cracks, uneven surfaces, and loose bricks. Don’t fret! With the right techniques and a little know-how, you can easily repair your brick walkway and restore its beauty. In this comprehensive guide, we’ll walk you through everything you need to know to tackle brick walkway repair like a pro.
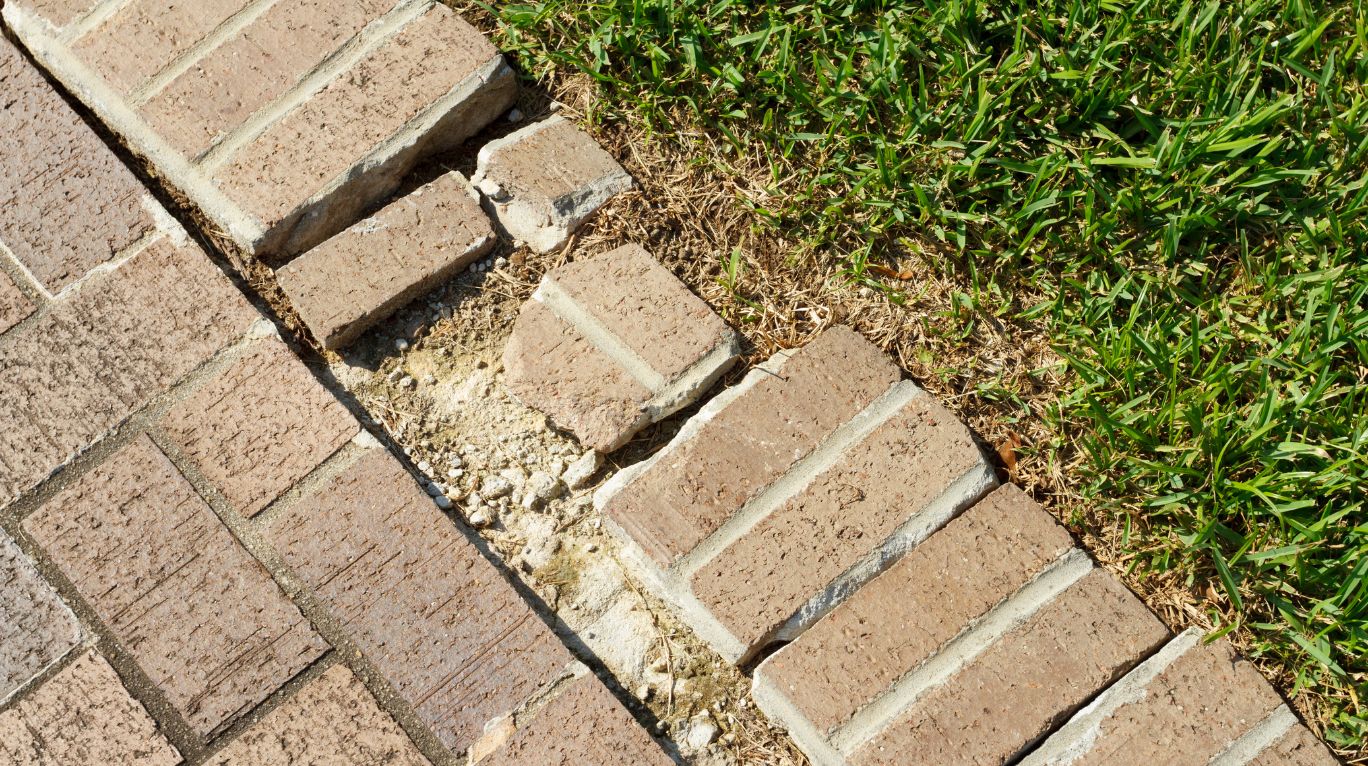
Understanding Brick Walkway Damage
Before diving into the repair process, it’s essential to understand the common types of damage that brick walkways can experience. These include:
- Cracks: Cracks can form due to shifts in the ground, freeze-thaw cycles, or heavy foot traffic.
- Uneven Surfaces: Over time, the ground beneath the walkway can settle unevenly, causing the bricks to become uneven.
- Loose Bricks: Loose bricks are not only unsightly but also pose a safety hazard.
Assessing the Damage
Begin by thoroughly inspecting your brick walkway to assess the extent of the damage. Take note of any cracks, uneven areas, or loose bricks that need attention. This step will help you determine the materials and tools you’ll need for the repair process.
Materials You’ll Need
Gather the following materials before starting your brick walkway repair project:
- Replacement Bricks
- Brick Chisel
- Hammer
- Masonry Sand
- Concrete Mix
- Trowel
- Safety Gloves and Goggles
DIY Brick Walkway Repair Steps
Now that you have your materials ready, let’s dive into the step-by-step repair process:
1. Remove Loose Bricks
- Start by carefully removing any loose bricks from the walkway using a brick chisel and hammer. Be sure to wear safety gloves and goggles to protect yourself from flying debris.
2. Clean the Area
- Once the loose bricks are removed, clean the area thoroughly to remove any debris or dirt. A stiff brush or pressure washer can be used for this step.
3. Prepare the Base
- Use a trowel to level the base and ensure it is compacted. This will provide a stable foundation for the new bricks.
4. Replace Bricks
- Place the replacement bricks in the desired pattern, ensuring they fit snugly into place. Use masonry sand to fill in any gaps between the bricks.
5. Secure the Bricks
- Mix concrete according to the manufacturer’s instructions and use it to secure the replacement bricks in place. Smooth the surface with a trowel for a seamless finish.
6. Allow to Cure
- Allow the repaired walkway to cure for at least 24 hours before walking or driving on it.
FAQs
- How long does it take to repair a brick walkway?
- The time it takes to repair a brick walkway depends on the extent of the damage. Minor repairs can be completed in a few hours, while more extensive repairs may take a day or two.
- Can I repair a brick walkway myself?
- Yes, many brick walkway repairs can be done as a DIY project. However, if the damage is extensive or if you’re unsure of your abilities, it’s best to consult a professional.
- What causes cracks in brick walkways?
- Cracks in brick walkways can be caused by shifts in the ground, freeze-thaw cycles, or heavy foot traffic.
- How do I prevent future damage to my brick walkway?
- To prevent future damage, make sure the walkway is properly installed with a stable base. Regularly inspect the walkway for signs of damage and make repairs as needed.
- Can I reuse old bricks for repairs?
- In some cases, old bricks can be reused for repairs. However, make sure they are in good condition and compatible with the existing bricks to ensure a seamless repair.
Conclusion
Repairing a brick walkway doesn’t have to be a daunting task. With the right materials, tools, and know-how, you can easily tackle common issues like cracks, uneven surfaces, and loose bricks. By following the steps outlined in this guide, you’ll be on your way to restoring your walkway’s charm and ensuring it remains a safe and beautiful addition to your property for years to come.